This instructable will take you through making a floor lamp with stuff lying around the house. I have only used things which were already lying around although you may have to improvise a bit depending on what is available with you. This was also my first proper project with the power drill so the results are not exactly smooth. But I learnt a lot and I will try and share the lessons in the respective steps.
Step 1: What Will You Need?
As mentioned, I only used what was already lying around the house. I used the following things:
- An old rusting hollow curtain rod. The dimensions are not a constraint but they determine how tall your lamp would be
- Couple of flat engineered wood pieces from a broken bedside table which was disassembled partly (the drawer had come out)
- An unused bamboo lampshade the wife had bought ages ago but never used. Any lampshade should as long as it has a hole in the top to bring in the bulb
- Some bolts and such
Measurements & counts
- Hollow curtain rod (185cm total)
- 2 pieces of wood (35cm x 10cm x 1.5cm)
- 4 bolts with nuts and washers (13cm x 0.75cm)
- 2 bolts with nuts and washers (7cm x 0.75cm)
- Cable (for bulb, min 210cm, can change depending on how far is the lamp from the plug point)
- 1 electric plug
- 1 hanging type bulb holder
- 1 can of spray paint (we chose matt black)
Tools
- Power drill
- Pipe wrench (optional but recommended)
- Pliers (optional but recommended)
- Drill bits for metal (sizes 2-6)
- Drill bits for wood (sizes 4-8 & 25)
- File for smoothening metal ends
Go through the instructable and you will realise you may not need everything mentioned above. I have put together everything I ended up using.


Step 2: Sizing Up
Measure twice, cut once.
By now, I have read the adage at least 20 times. And by golly, it is true. I made a bunch of mistakes when I should have been more careful measuring and marking before getting into cutting. Don’t make that mistake.
Lets figure out how tall you want your lamp to be. Mine needed to be sort of the same height as the wife. That gave me a 150cm height. I needed another 35cm length to become the arm to hold the light (see the design I made before starting). As you can see, I was concerned if the lamp would be balanced enough with the light attached. Hence, I made a plan to have a counterweight. This proved unnecessary in the end but it was good that I had planned for it.
Also see the floor board design. I originally planned to have a single floor board. It later turned out that the thickness of the board was way too little to handle the weight. I eventually decided to add another board with some gap to ensure stability (see the initial images to see what it looked like).

Step 3: Cutting the Pipe
I didn’t have any tools to make a clean cut to the pipe. Hence, I improvised. I used a size 3 metal drill bit to drill a series of holes to make a full circle. I used a strip of transparent tape to ensure the bit stayed in place and there was no metal dirt flying around.
Then it was just a question of applying some light force to make a clean break.
The edges from the exercise above are very very ragged. Please ensure you take care of safety. The metal file is quite a capable beast but requires some effort. At the end, I got a nice clean set of edges.


Step 4: Drill All the Holes
This is the tricky and very important part.
Floor board holes
First, drill 4 holes at the 4 corners of both the boards. I used the wooden drill but sizes 4-8 for this (feel free to experiment). While doing this, make sure the following points are taken care of:
- The width of the hole is just a bit larger than the width of the bolt (the bold used here are the 13cm x 0.75cm ones). This is important because we need the freedom to adjust the gap between the two floorboards
- The holes in the bottom and top board line up perfectly. Any changes here will be quite visible so avoid this
Second, drill the hole for the pipe. I used the wooden drill bit size 25 to create the hole in the top floorboard. The end result was messier than I thought. The bit moves around a lot. But the results was sufficient to get the job done.
Now, align the hole in the top board and mark out the circle in the lower board. Using the same sized bit, create a semi-hole (i.e. cut through but do not create a hole). This step, while not mandatory, is highly recommended since it gives a nice groove for the pipe to be wedged in. Finally, create a smaller hole in the middle of this semi-hole to allow the wire to go through. This ensures the wire is not visible anywhere.
Put the pipe in both the boards to make sure all the holes are properly aligned.


Pipe joint hole
Measure twice. Cut once. Yes, again.
I chose to create the joint 10cm from the ends of the primary pipe (vertical) and the arm pipe (horizontal). This gave enough support while looking neat and clean. The hole has to be made in a manner that a bolt can go straight through both the pipes lines up next to each other.
The bolt used here is the one with 7cm x 0.75cm. This time, however, make sure the size of the hole create a super snug fit with the bolt. It should require you to use some force to get the bolt through the hole. I used the metal drill bit size 6 to create this hole. In fact, I had to wiggle the size 6 around a bit to create a hole just wide enough to hold the bolt. The other sizes were used primarily to create ever larger holes to not put too much strain on the larger bits.
Once you have got the bolt through, it is time to create a hole for the wire to go through. The size of the hole depends on the wire you are using. I wanted as little of the wire to be visible. So I created 1 hole each in the little space behind the pipe joint. See picture for better reference. Make sure you test with actual wire before moving on from here.


Light bulb hole
You will notice the wire for the bulb does not come out of the end of the pipe. It appears from the middle of it. You will need another hole for this. I drilled this 10cm from the end. You can experiment with this more.

Base support hole
The final hole we need to make is for ensuring the vertical pipe stays snug with the two floor boards. Since my first hole in the floorboard was not very clean, the pipe was slipping away without any support. I decided to provide for a bolt just underneath the top floorboard. With this in place, the lamp could be lifted by the vertical pipe and would be held tightly in place.
To do this, measure carefully (yes, again) the desired gap between the boards. This depends on the length of the bolts. Remember, we are using the 13cm bolts here. I was going to use 3.5cm off the top (1.5cm for board thickness, 1cm for the top nut, 1cm open on top). So the hole in the pipe is 13cm – 3.5cm = 9.5cm from the bottom. You will typically have a margin of error of about 1cm so better be careful here.

Wire channels in the bottom board
We now have a hole to get the wire through to the bottom of the bottom board. We need to create a channel in the bottom board to cleanly take the wire out else the board will be unbalanced. See the picture to see what I did.

Check everything
After you have drilled everything, double check that all bolts line up with all the holes as desired.
Step 5: Line Up Everything
Now, for a quick dry run, put everything together including the wires running through and attach the bulb. This step immediately points out anything wrong till now and also gives a nice little preview to the wife. Necessary to sign up a photographer for the project!
I had to do this step 4 times over. Every time something or the other was off. These were the solutions I applied.
Off-balance
The set up did not stay stable. In the video, you will see I have to hold the whole thing together. To solve this, I increased the gap between the floor boards. I also reduced the length of wire sticking out of the arm. Both these gave it a bit more stability. But real comfort came when I tightened the nuts around the bottom and top floor boards.
Getting the wire through
This was painful. I used a safety pin lodged into the wire which was picked up with a set of tweezers. No lessons here. Just common sense.

Step 6: Painting
Time to get painting! My favourite part.
I used a matt black spray paint. It covered everything really nicely. I also made sure to spray a bit inside the end of the pipes to cover a bit of the rust.
To get a nice clean look, I painted the bolts, nuts and washers as well. Please remember that once you start screwing in the nut, some of the paint can chip off. Just keep a tiny bit of the paint aside to touch up once final assembly is over.
This was my first time painting so it was a lot of fun.


Step 7: Final Assembly
[Forgot to take pictures during final assembly. Images are from a full dry run just before the painting. All the key points are handled here as well.]
First, line up the wire! I missed this step and had to disassemble everything and restart. Once you have the wires in, it is prudent to connect the bulb once to ensure it all works. Remove the bulb after testing.
Next, lets get the vertical pipe erect. Remember, the wire goes through both the floor boards. Put the 4 support bolts but don’t tighten them yet. Put the base support bolt into the pipe. Now tighten all the bolts to your liking and get the structure to stand up on its own. Readjust if necessary.
Next, set up the joint between the two pipes. Ensure the arm does not swing by itself but also that it can swing if you push hard enough.
Next, fit the wire at the bottom into the wire channel we created earlier. Make sure the floor board is stable and connect the plug to the wire on this end.
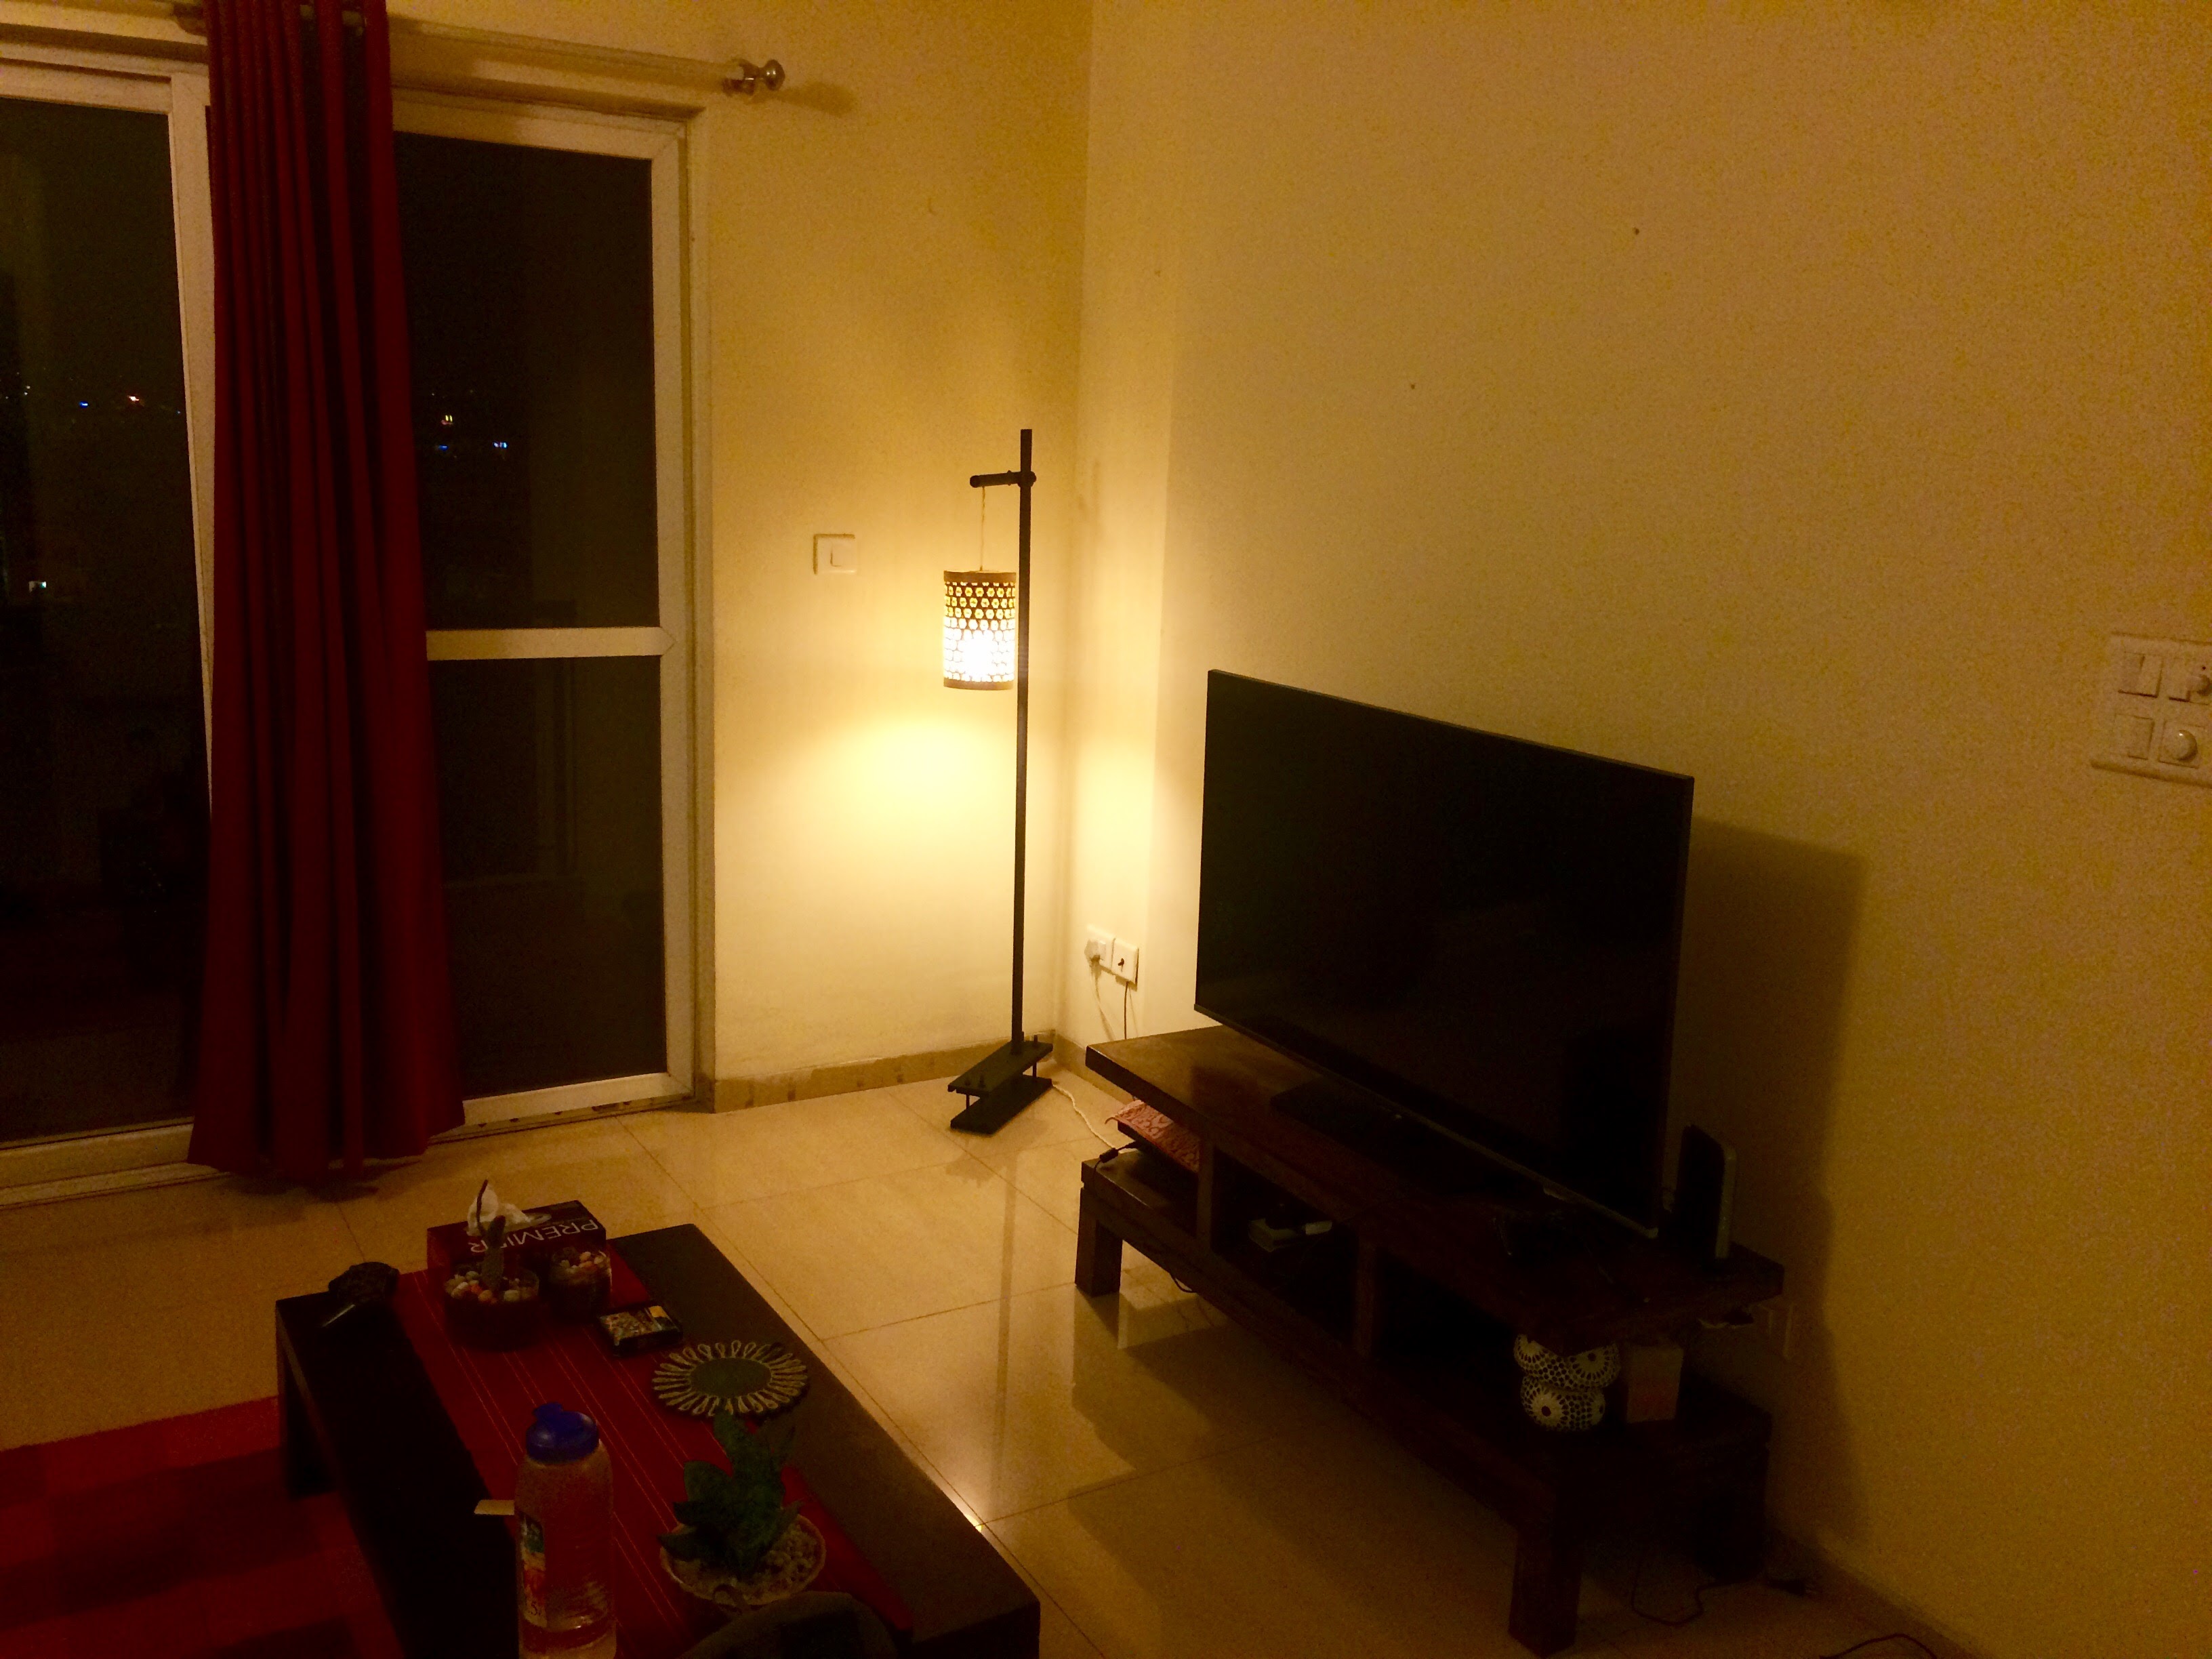
Finally, connect the lampshade and the bulb.
Time to light it up! Hope you enjoyed it.

This tutorial also appear at Instructables.com: Tall floor lamp made from scrap around the house
Comments