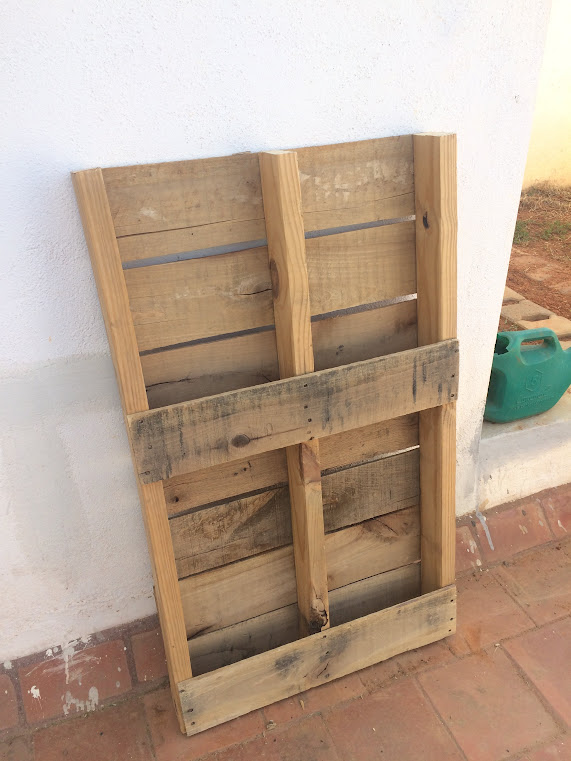
Pallet planters are all the rage in the up-cycling community. They are extremely useful (10-20 plants in a tiny space), look beautiful and are easy to make. So I fished out an old pallet from the local kabaadi-wala and got to work.
Cost of the pallet. A princely Rs 350. If you are looking for reclaimed wood, you can bag as much as possible for Rs 45 a kilogram. You will, of course, have to do a lot of fishing yourself.
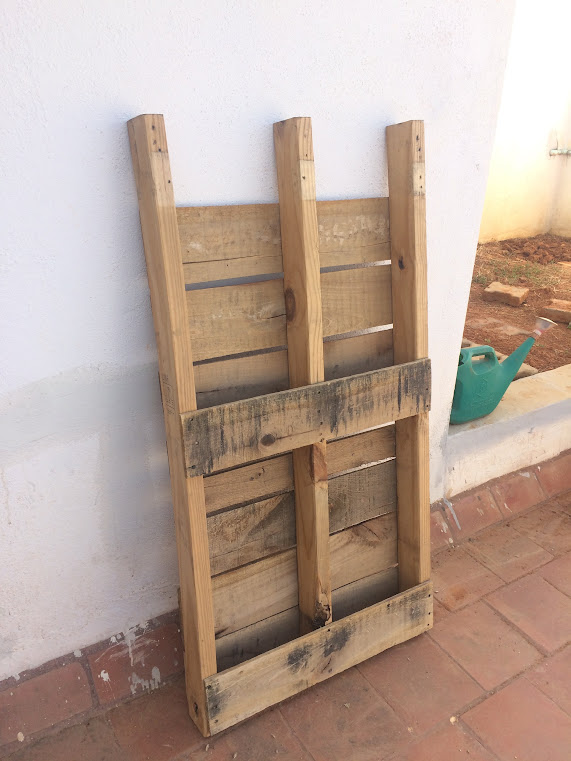
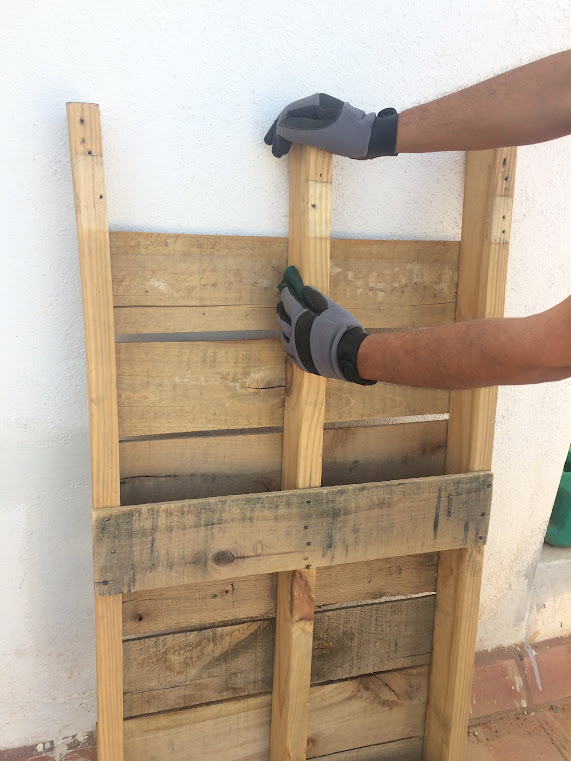
Forgot taking a picture before I starting working on it. I began by removing the top panels to shorten the height of the pallet.
Gave it a solid scrubbing to get rid of the grime, dust, cobwebs and sundry splinters. No fancy materials needed here since this is going to be exposed to elements anyway. Just old fashioned elbow grease with a bit of Scotch Brite.

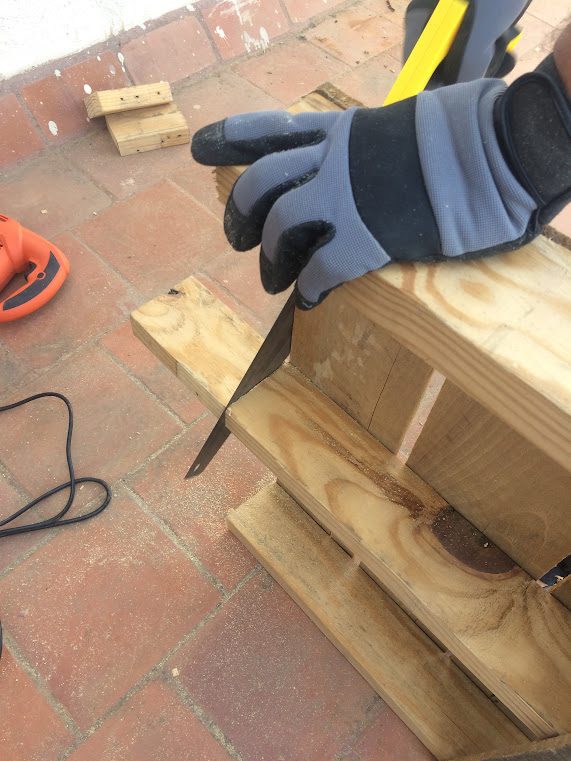
Next, cut-off the excess wood on the top to bring it to the desired height. This one needed to be low enough for the wifey to admire and water comfortably. The jigsaw did most of the work. The handsaw came in when the space became a bit too tight.
Nice. The top is now smooth and ready for the next steps.
Time to wrap up the top. Drilled a few pilot holes and re-used the panels removed from the top to create the fence for the top row.

Time to create the base for our planter. Depending on the kind of pallet you pick up, you may not need to do this step but mine came as a rather empty skeleton.
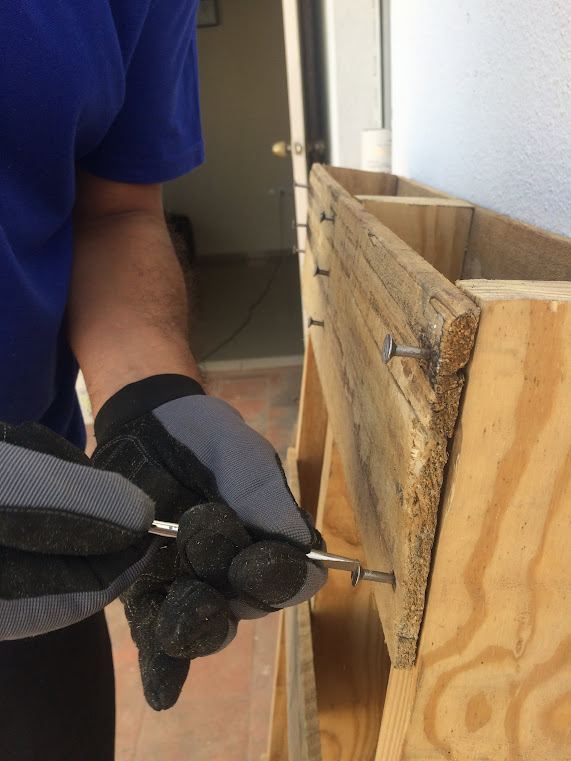
I had some old inch thick wood panels lying around which just happened to fit perfectly the space between the back and front of the pallet. Turn the pallet upside down to access the bottom. Add some glue to the sides and push in for a really snug fit. Clamp it to make sure the glue holds. Take the time to put in a few screws for a really strong hold. Rinse and repeat till you have all the bases.
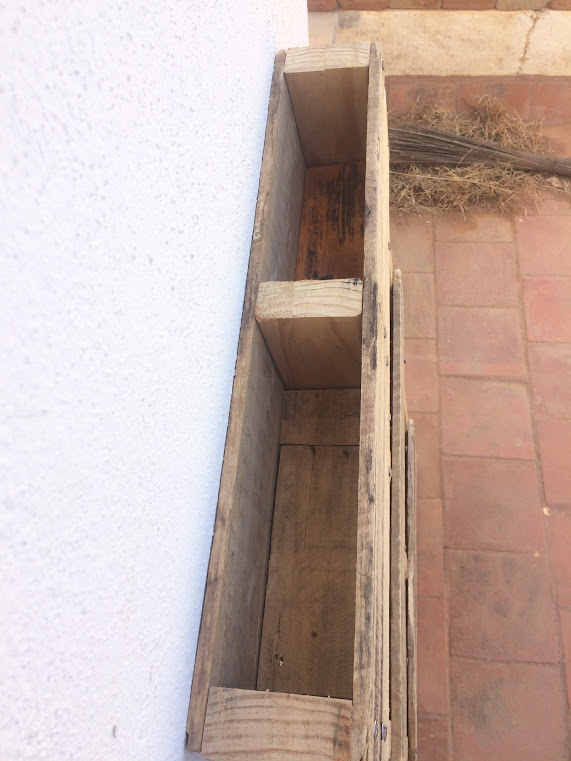
Turn it back right side up. Your pallet is now ready to accept plants.
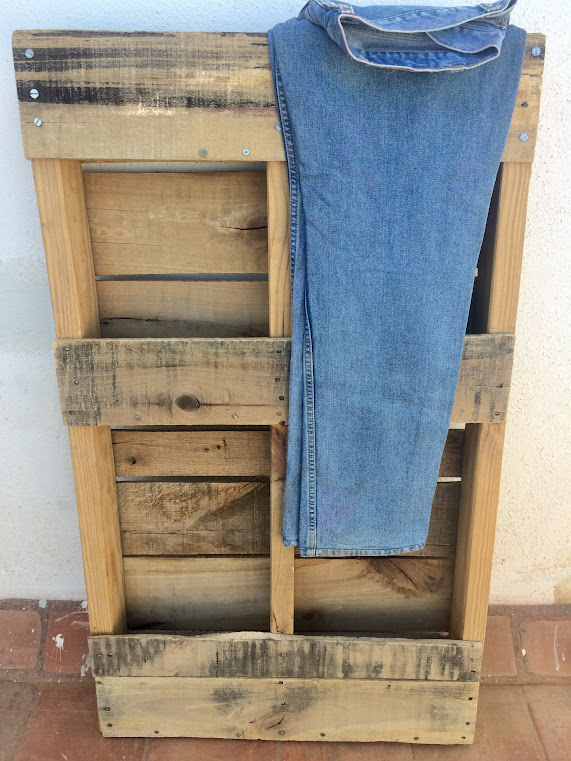

But before you put your plants in it, you need to add a lining to the inside of the compartments. The lining will hold the soil together but allow the roots to breathe. You can get lining at your local garden store but we decided to take the up-cycling ethos a notch higher.
Denim is extremely sturdy, breathes very well and looks fantastic. Out come a pair of old blue jeans which, thanks to the wife, are now too big for my waist. Cut it to size so there are no nooks from where soil can leak out. Plaster in some Fevicol and we are in business.


Now comes the fun part – selecting plants!
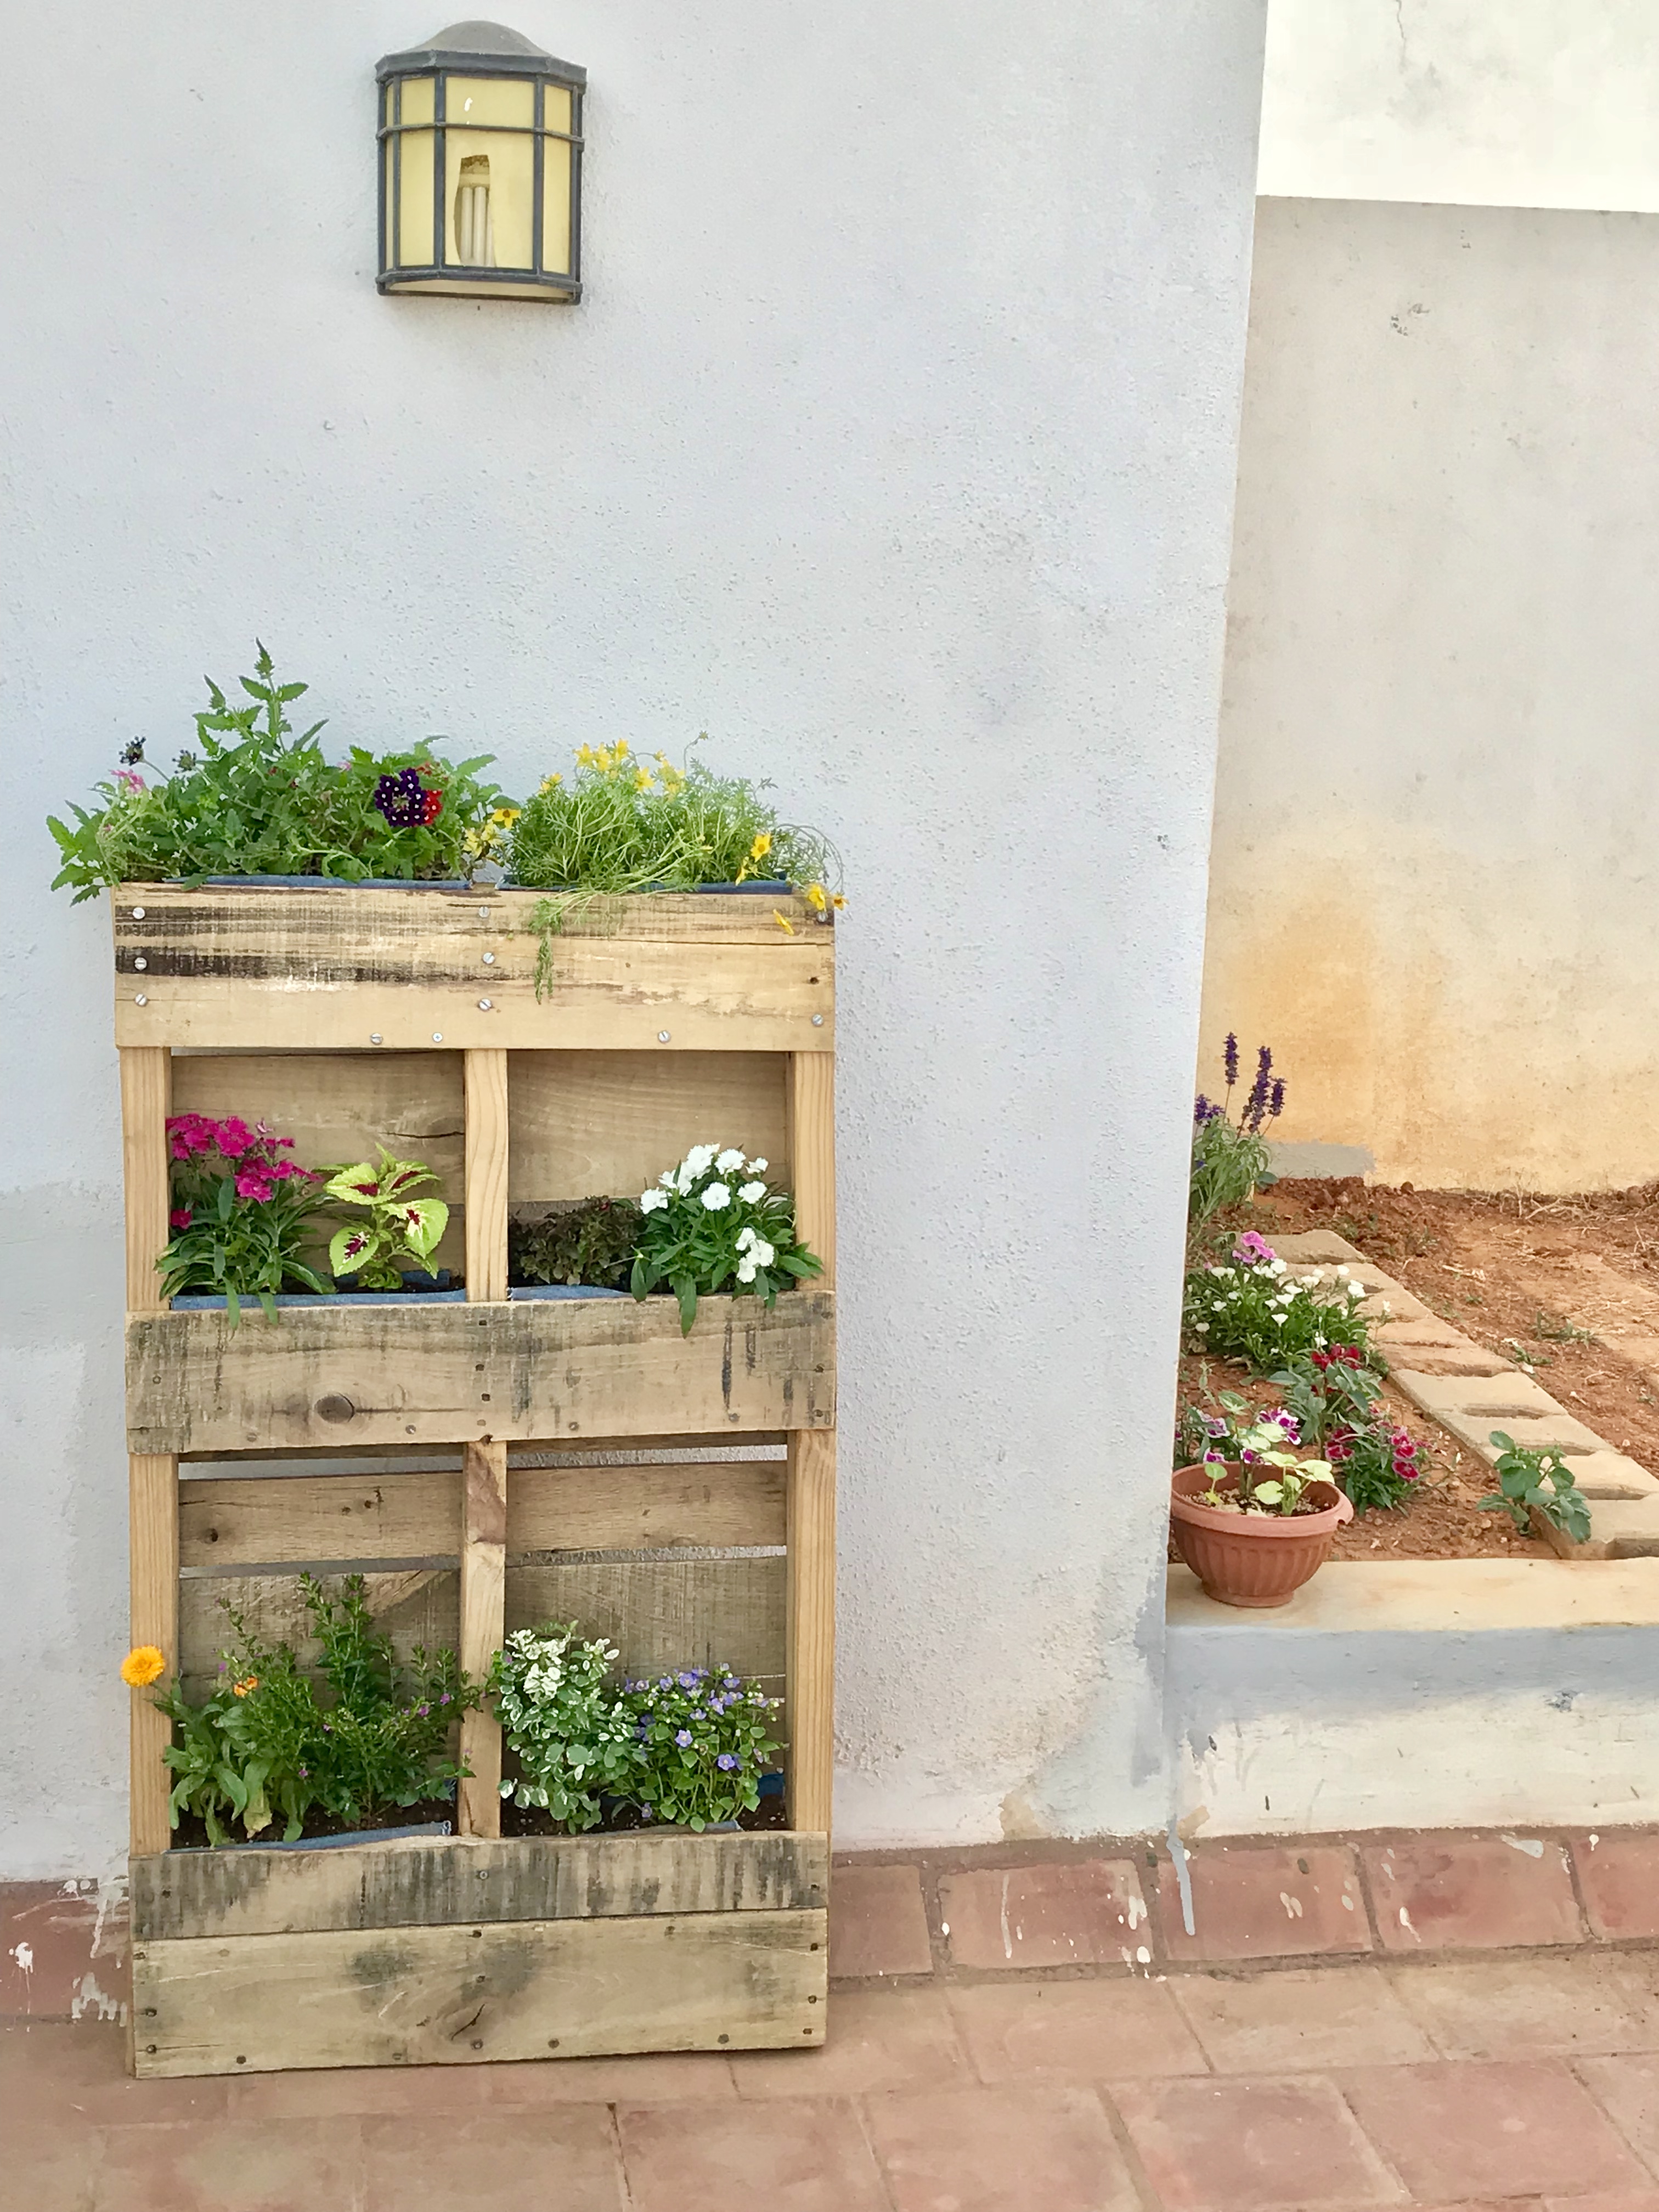
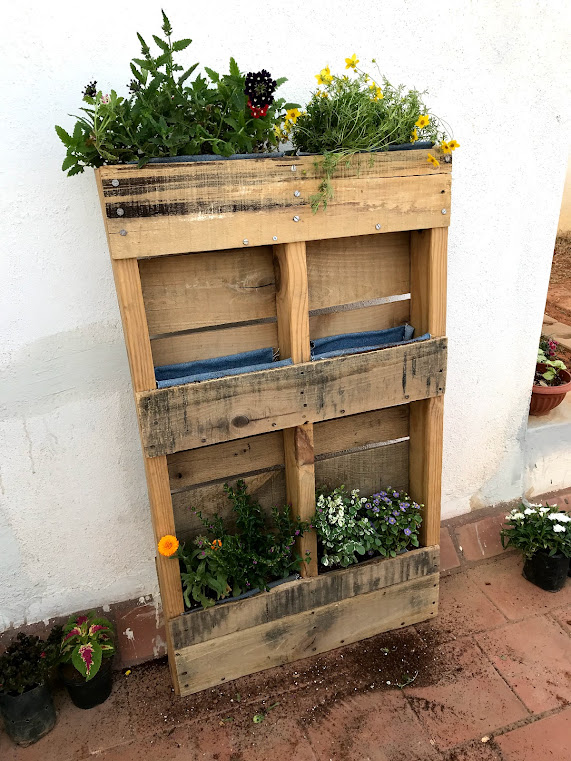
I have been cagey about putting plants too close to each other fearing they won’t have space to pick up nutrients. But with a pallet planter, the trick is to plant them close together so they give a busy feel. Mix and match a few tall flowering plants with some bushy short plants. Go crazy with colours. Play with shrubs, tall flowers and creepers for the right effect for you. Just remember to choose plants that will go with the location you intend to put this planter in. This is your canvas. Make it interesting.
We chose to go for yellow, red and white creepers on top which will flow down for lovely sinuous feel. The middle row gets short shrubs with green and blue colours. In the bottom row (where the root section is taller), we went for a chrysanthemum, ficus and Persian violet for a riot of colours.
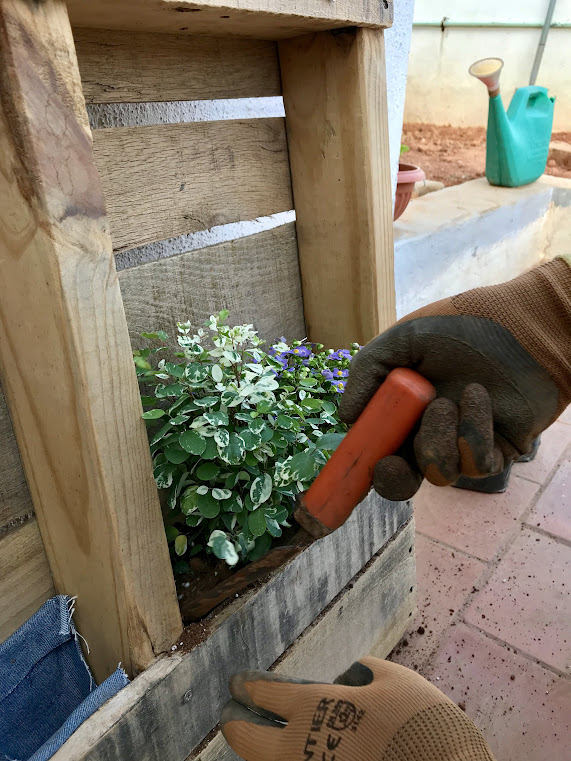
The planting is a bit tricky due to the cramped space. If your plants are mature (like ours were), the root ball will likely be bigger than the space in the pallet. Be gentle as you remove excess soil and try not to damage the roots themselves. Try and get the root as deep as possible. Fill it up with compost rich soil and give them a thorough soak.
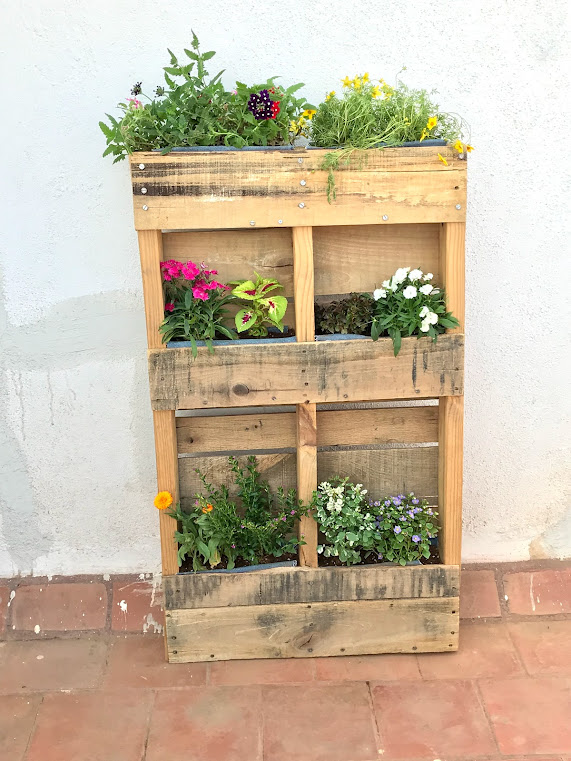
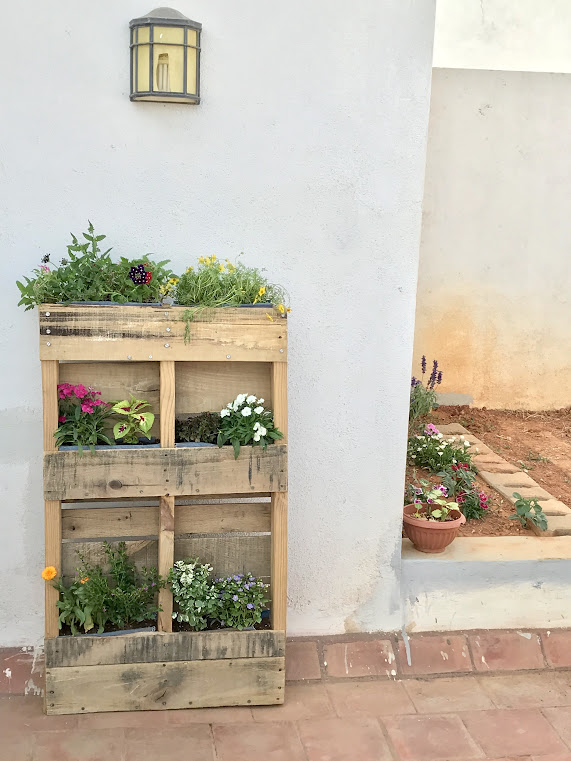
Your planter is now ready! Depending on the kind of plants you have chosen, find a place for your new planter in a balcony or on your roof. Remember to give your plants a dose of liquid fertiliser every 15 days since there isn’t enough soil to feed nutrients to your plants.
Keep up-cycling!
Comments